For more details about symbols and conventions used in the current page see the proper section in:
Symbols and conventions used in the documentationIntroduction
This guide aims to provide you with the information needed to carry out a Mago.net installation.
We will look into its architecture and we will learn how to install and remove the Server and the Client side, how to set the basic configuration, and how to update the application to the latest version.

If you are familiar with Mago.
net architecture, you can go to
Quick Installation Guide directly, otherwise continue reading.
Architecture of the installation
Mago.
net is a modular ERP application written in Visual C++ and C# and based on several technologies:
MFC,
.Net Framework,
Internet Information Services (IIS),
ASPNET,
Web Services,
Windows Communication Foundation (WCF).
The architecture of the Mago.Net installation is a "client/server" one. This expression must not be intended in its wider meaning, but it is useful to highlight how the parts that make up the installation can be distinguished between Server and Client.
Both of them are equipped with a specific installation procedure.
The
Server side is represented by the resources (Web Services, Asp.Net pages, configuration files, dictionaries, menus etc) hosted on IIS and File System.
The
Client side is represented by all the executables and libraries, needed to run the application (
Mago.Net.exe) in the memory of client machine.
Distribution
Mago.
net is designed to be used either on a single workstation or in a multi-user environment. When both the server part and the client one are located on the same and the only workstation, then we will say it a "
stand-alone" installation, otherwise we will distinguish between a Mago.net server and one, or more than one, Mago.
net clients. We can also configure Mago.
net on
Terminal Server and/or, thanks to a special Mago.
net module (
Easylook - which requires no installation) work via web.
Requirements
In order to install and configure a machine for working with Mago.
net, see
Mago.Net prerequisites.
Installing Mago.Net Server
If you are familiar with Mago.
net installation, you can skip this section and find the following guide useful:
Quick Installation Guide.
 The multi-instance (multiple installations of the Server side) is not nor expected neither supported.
 Overview
Like the other applications we are used to installing on our PCs, the Server installation is based on the Microsoft
® Windows
® Installer (an application installation and configuration service), and it is provided through a single
msi file, valid to install each Mago.Net editions in each language.
The file name is univocally identified via the name format:
MagoNet- MAJOR NUMBER.
minor number.
service pack (build Number-
buildateAAAAMMGG )
e.g. MagoNet-3.5.0(build999-20110331).msi
In short, a Server installation includes:
- creating the destination folders
- copying of application files
- sharing folders (Standard and Custom)
- creating a virtual folder
- creating some virtual applications
- creating Client Setup.
Before starting the installation make sure you are connected as
Administrator and that the User Account Control (
UAC) is disabled.
Wizard
The installation is performed through a wizard which helps the user to make the proper choices.
To start the wizard double-click on the msi file or digit the proper command (
see KB000003 
).
Before starting the installation:
- make sure you are connected as administrator,
- disable the UAC - User Account Control (if the o.s. allows it),
-
) +R+UserAccountControlSettings.exe
+R+UserAccountControlSettings.exe
- run the setup through the "Run as Administrator" option (see KB000003 ).
First of all, it checks for requirements.
In details it checks:
- the .Net Framework presence
- the IIS presence
- the status of IIS services
- the status of Server service (needed for sharing over the network)
in case of lack or malfunction of at least one of them, a
Summary form is being displayed
that provides the
Help button, which redirects to the specific section of the Help Center.
Vice versa, if the prerequisites check is successful, a
Welcome form is being displayed to start the setup by performing the following steps:
1. Choose language application
In this step you can choose the preferred language. To add other languages is necessary to choose
Advanced settings.
As certainly already known, one of the main functions of Mago4 is the
multi-language support. This not only means that the program forms are translated into all the supported languages, but above all that Mago4 can be fully adapted to the local accounting-fiscal rules.
The
functional localization is embedded in the serial number used for activation and
is not, therefore,
controlled by this parameter.
Please, take the necessary time to carefully read the End User License Agreement before to tick the checkboxes, that allow you to continue to the next step. Thanks to the
Read in PDF button also you can show the EULA, through the PDF reader program available in your system. If the reader lacks, a Windows system message will be showed.
3. Choose the setup type
Choosing the
Default settings, reccomended for demo installation and/or stand-alone configuration, the installation process manages all the parameters:
- Installation Path -> %ProgramFiles%\Microarea (or %ProgramFiles(x86)%\Microarea on 64bit o.s.)
- Installation Name -> Mago4 (corresponding to a subfolder of the above path)
In case it conflicts with homologous virtual folder it is renamed through progressive index e.g.:
Mago41. This feature aims to avoid conflicts with previous versions (i.e. 2.x), with virtual folders handmade or related to any incomplete uninstallation, but does not allow multi-instance since it is not provided nor supported.
- Web site -> Default Web Site (usually identified by Id=1 and listening on TCP port 80)
Otherwise, more skilful users can choose the Advanced settings to customize every aspect of the installation
including the above parameters
including the ability to select a different Web site (name and TCP port),
and choose the features to be included or excluded
reminding that:
- Mago4 is mandatory and can not be excluded,
- Taskbuilder Framework is mandatory and can not be excluded,
- Taskbuilder Studio adds ReportingStudio and EasyStudio,
- each Language Package contains: the Default data, the Sample data , and the Dictionaries needed to the translation.
The Language Package associated with the Application's language (set in step 1.), is automatically selected, with the exception of English, being the native language with which the program has been developed, does not have the language package. It is always possible to include or exclude others at a later time simply re-running the Setup.
4. Summary installation settings
Before starting the installation process, by pressing the
Install button, a brief summary shows the installation settings (auto-proposals or selected by the user) that will be applied.
Once the installation actions end
the
Client setup generation process starts,
needed to run the Client Setup on the remote clients.
Activation
You need an active Internet connection to activate the product.
In order that what you have installed runs properly, you need to get from the supplier the "
key", which enables the licensed user, to use application.
You can get this "
key" through the activation process.
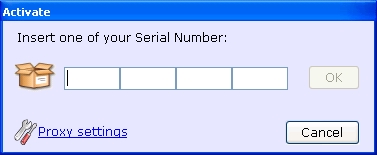
Entering the server serial number a form pops up to be filled with your data:
User Info
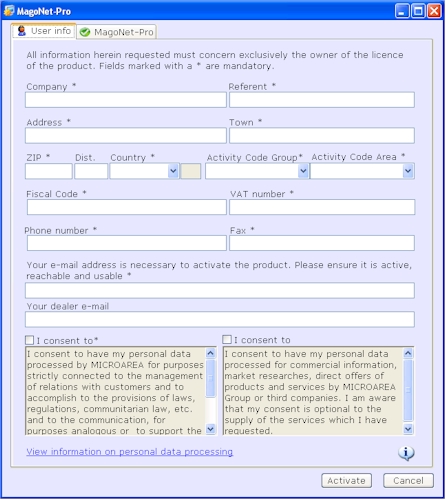
“User” is the final licensee of the program.
All the data provided in this form will be registered in a database, therefore you will need to allow electronic personal data processing. Fill all the fields with the data of the licensee of the product. Fields marked with "*" are mandatory.
Modules configuration
In the second tab there is the group of purchased modules that must be activated.
The list of modules depends on the edition you have chosen; the Server module is always present and you can not omit it. The "Package" modules are a group of several modules including the Server one.
To complete the configuration select the chosen modules and enter the serial number; the modules bearing the words “Insert...” are subject to CAL.
On the contrary the modules bearing the words “Not required” can be activated without restrictions.
Anyway you can modify the configuration at any time (selecting
Activation, My Mago.Net ... from the Administration Console menu).
Proxy
Clicking
Activate a request will be sent to the Microarea web servers, via http protocol, therefore please make sure that the internet connection is active and that the followings url are reacheble:
- www.microarea.it,
- ping.microarea.eu
in the presence of the proxy you can configure the credentials through the appropriate menu item
Activate » Proxy Settings
.
Demo
The Demo version requires a serial number too. The activation, normally, expires after 30 days.
You can get Your demo serial number (available for partner only) from the "My Mago" page of the Private area of the Microarea portal:
My MagoBase operations
To work with Mago.Net you need to have at least one (1) company and one (1) user available. The configuration of these pieces of information is delegated to the Administration Console.
Administration Console
Companies and users are created and managed through the Administration Console tool. The relevant information is stored in a special database (MS Sql Server) named "
system database".
The setup does not check for and does not install any "database" product; the needed products must be independently installed through the special tools provided by the producers (Microsoft and Oracle).
System database
If you running the Administration Console for the first time then you need to create the system database.
In the connection form you need to:
- enter the access credentials to the server:
- Server: the instance of Microsoft Sql Server (if it's a named instance it is identified by the network name of the computer plus the instance name that you specify during installation)
Set with the SQL Server and Windows Authentication mode (see KB000002).
- Login: an account belong to the sysadmin server role
The Windows Authentication mode is not supported.
- Password: the password of the above account
select the option "New",
type the name to be given to the system database
The Standard edition sets by default the database name into "StandardSysDb" and it cannot be changed.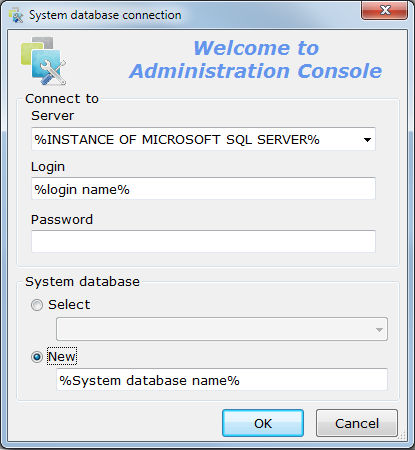
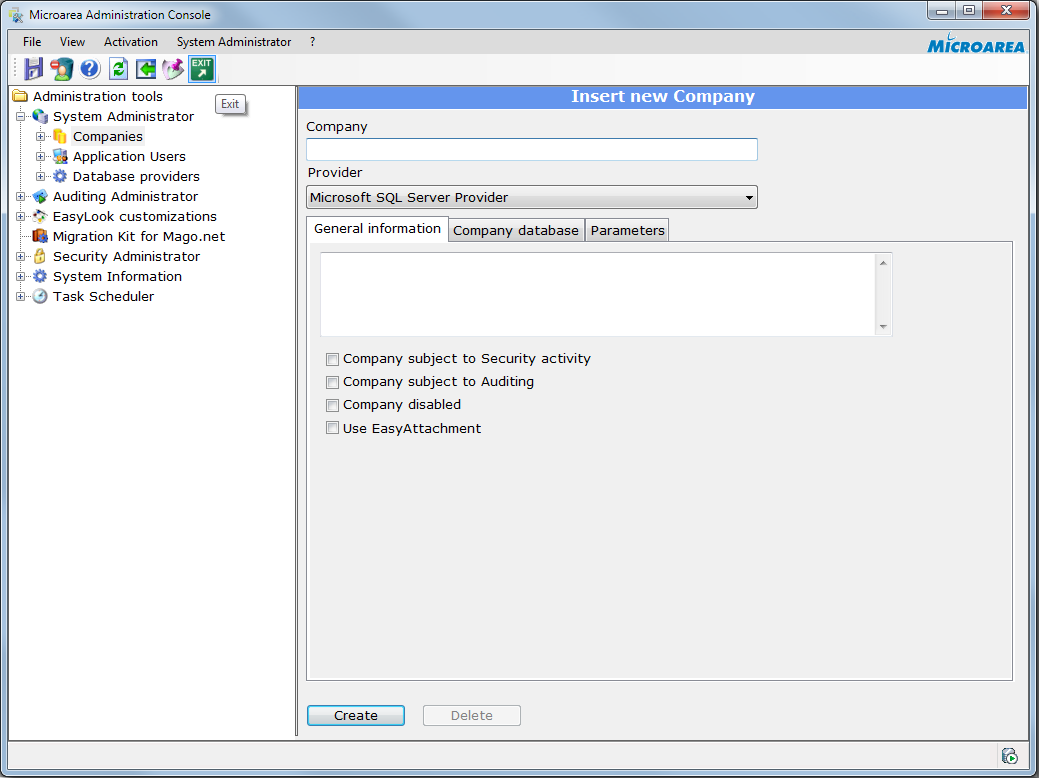
Company database
The company is the logical unit with whom the Mago.
net user establishes a connection. Any kind of data managed by the application converge into it, actually they converge into a database (MS Sql Server or Oracle) named
company database.
Through the Administration Console you can create the company and the company database at the same time: to this purpose you need to open the branch
Companies and users » Companies, press the button "New" and fill the window “Insert new company" with all data required.
For more details about the supported databases see:
Supported databases.
To complete these basic operations a new user should also be created, but actually Administration Console already created, at the first connection, a user whose name is corresponding to the login used to access the system database.
For more details about the features provided by the Administration Console see:
Administration Console Reference Guide.
OLD
Quick Start
If Mago.
net is not yet configured
QuickStart starts to simplify the base operations (see above), helpful in a Demo or Test environment.
 Mago.net Quick Start |
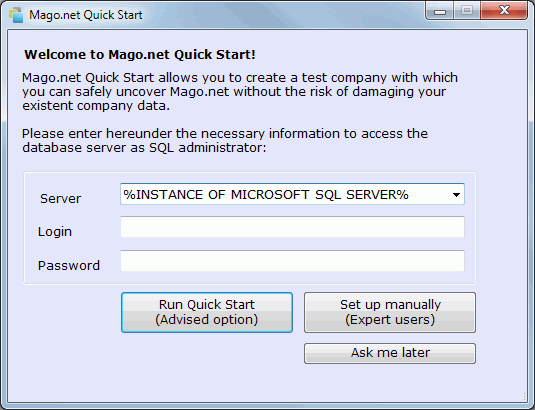
If the user chooses the
Expert users mode the Adminisration Console will be opened, otherwise (
Advised option) the procedure executes the following operations:
- requires the credentials to access to Microsoft SQL server:
- Server: the instance of Microsoft Sql Server (if it's a named instance it is identified by the network name of the computer plus the instance name that you specify during installation)
Set with the SQL Server and Windows Authentication mode (see KB000002).
- Login: an account belong to the sysadmin server role
The Windows Authentication mode is not supported.
- Password: the password of the above account
- creates the system database: MagoNetSystemDB (StandardSysDb if Mago.net is Standard edition) on the above specified Server
- creates the company, MagoNetCompany with the database (MagoNetCompanyDB) on the above specified Server
- imports sample data
- creates two application users Admin e User with empty password.
Quick Start Wizard
The
Activation and the
Base operations actions, described above, are summarized and proposed by the
Mago.net Quick Start Wizard a wizard that runs on the first launch of the program, in case it is not yet Activated and Configured.
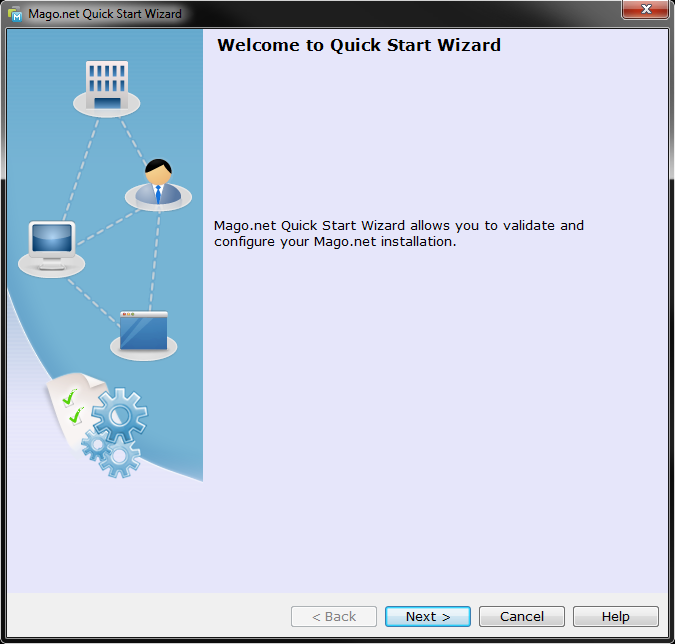 Welcome |
After the Welcome form, the wizard shows the same forms used to activate the product, (see
Activation)
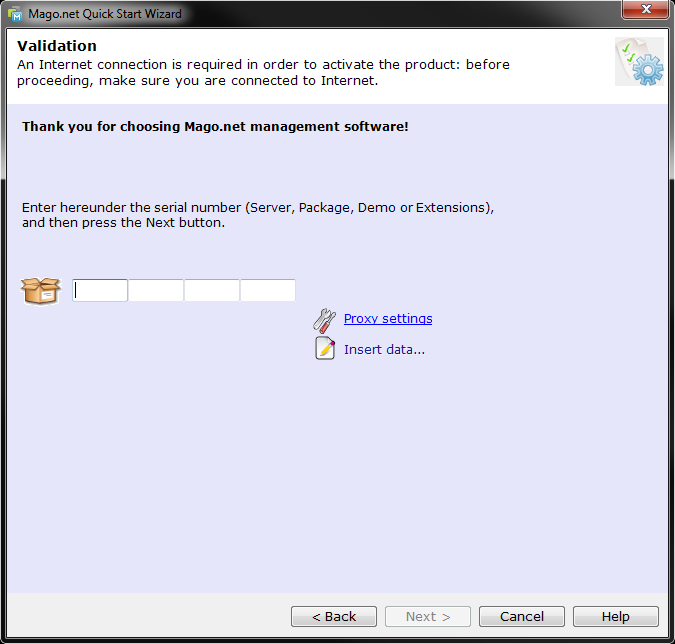 Validatoin |
then allows to carry on or skip the configuration
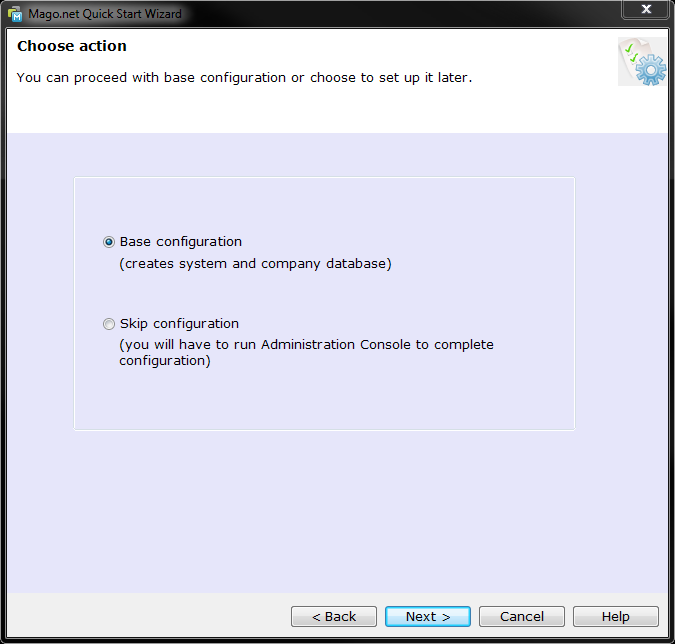 Action |
if the user decides to proceed, we will do the following:
- requires the credentials to access to Microsoft SQL server:
- Server: the instance of Microsoft Sql Server (if it's a named instance it is identified by the network name of the computer plus the instance name that you specify during installation)
Set with the SQL Server and Windows Authentication mode (see KB000002).
- Login: an account belong to the sysadmin server role
The Windows Authentication mode is not supported.
- Password: the password of the above account
- creates the system database: MagoNetSystemDB (StandardSysDb if Mago.net is Standard edition) on the above specified Server
- creates the company, MagoNetCompany with the database (MagoNetCompanyDB) on the above specified Server
- imports Default or Sample data (helpful in a Test/Demo environment)
- creates two application users Admin e User with empty password.
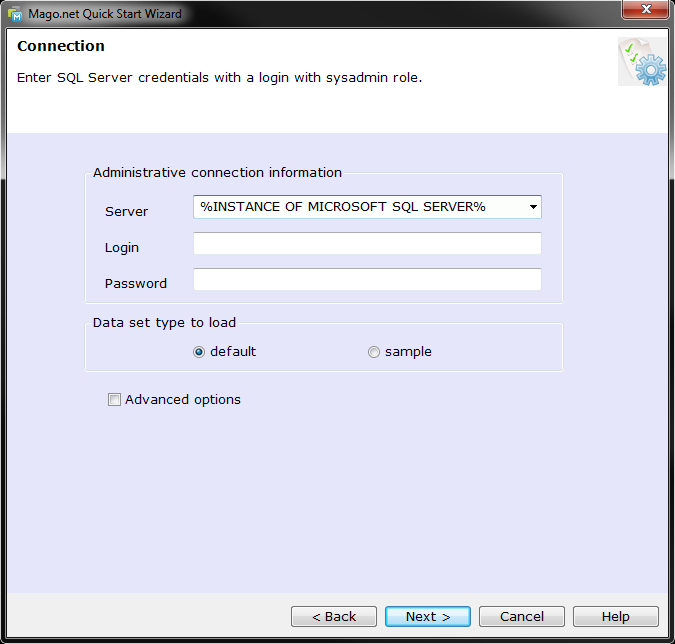 Connection |
acting on the "Advanced Options", the user has the possibility to modify some parameters
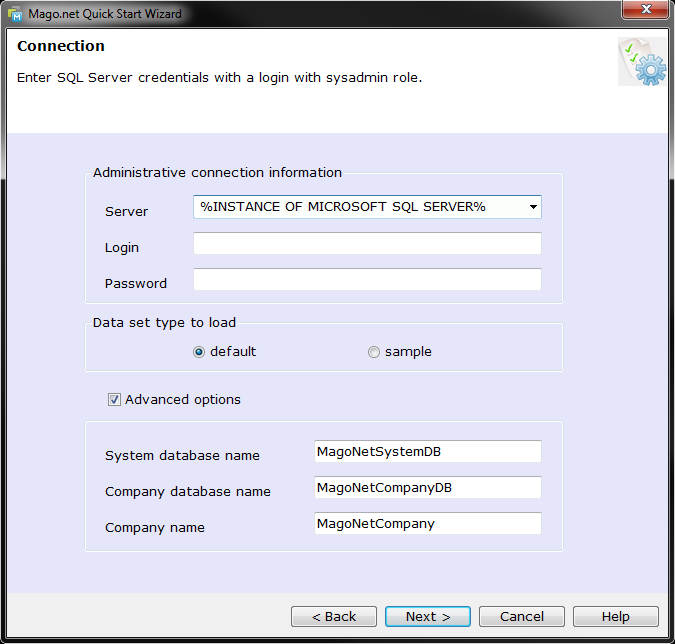 Connection with advanced options |
Clicking the Finish button in the Summary form
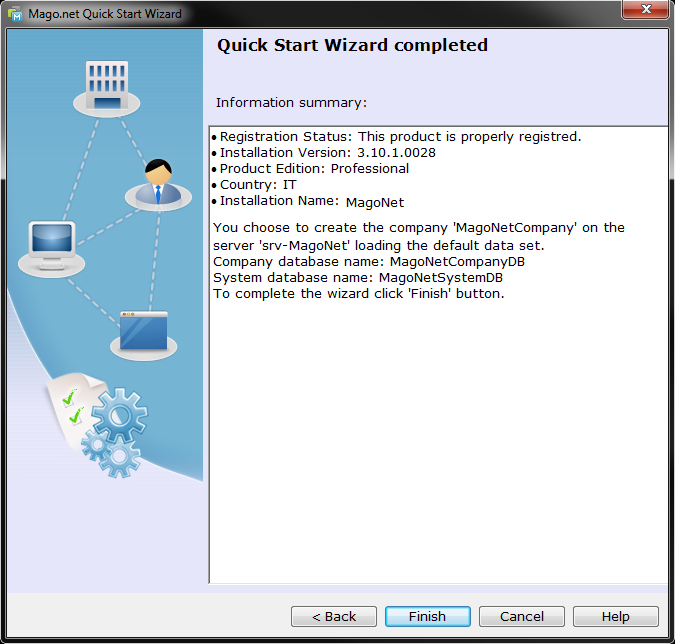 Summary |
the procedure starts the elaboration
 Running |
Installing Mago.Net Client
The Server Installation is self-sufficient since it makes available both the configuration tool (
Administration Console) and the application entry-point (
Mago.Net.exe) so installing the client side on the
Mago Server is not necessary, unless if it is useful the presence of the client, for example, for testing and/or distribution on the Terminal Server.
Vice versa to take advantage of the technology provided by MagicDocument you need to install it (Microarea Magic Document for Excel - Microarea Magic Document for Word) also on the Server.
Overview
The installation of the client side is based on
Microsoft ClickOnce.
ClickOnce is a deployment technology that allows you to create self-updating Windows-based applications that can be installed and run with minimal user interaction, overcoming the major issues inherent in deployment with Microsoft Windows Installer:
- Impact on the user's computer - each application is self-contained and cannot interfere with other applications,
- Security permissions - the installation is possible even for users without administrator privileges.
Any application published using ClickOnce technology is named "
ClickOnce Application".
ClickOnce applications can be self-updating; they can check for newer versions as they become available and automatically replace any updated files.
A ClickOnce application is based on two
XML manifest files:
- a deployment manifest (Mago.Net.application) - that describes how the application is deployed, including the location of the application manifest, and the version of the application that clients should run,
- an application manifest (Mago.Net.exe.manifest) - that describes the application itself, including the assemblies, the dependencies and files that make up the application, the required permissions, and the location where updates will be available.
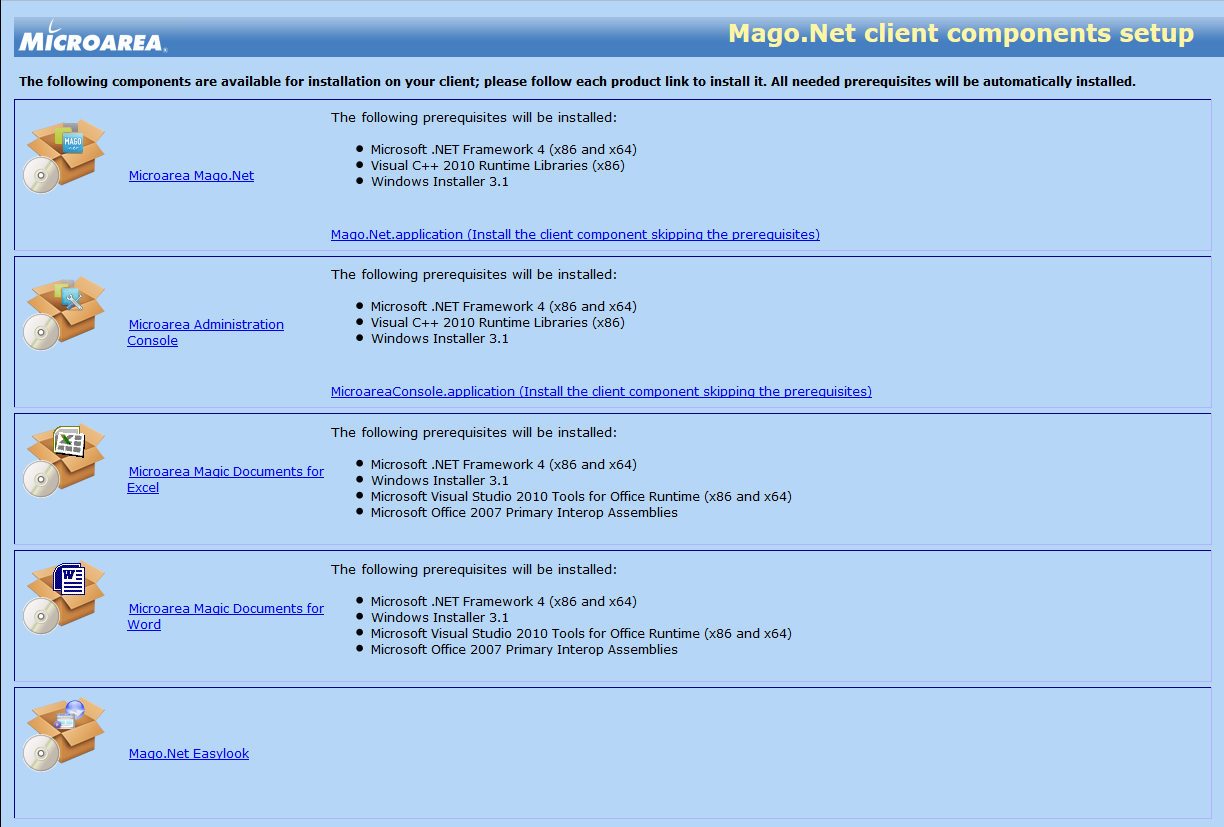
Seen their variable content, the manifest files are dynamically created and signed at the end of the installation server during the "
Client setup generation" which also produces the summary page (
index.htm) of all the "
ClickOnce Applications" available:
- Microarea Mago.net
- Microarea Administration Console
- Microarea Magic Document for Excel
- Microarea Magic Document for Word
The item Mago.Net Easylook is not a ClickOnce application, but it is the simple link to the URL to access the
Easylook module.
Although to start a ClickOnce application, is enough to perform the deployment manifest (
Mago.Net.application) the web page "
Mago.Net client components setup" (
index.htm) provides, for each ClickOnce application, its Bootstrapper:
- Mago.NetSetup.exe
- MicroareaConsoleSetup.exe
- MagicDocumentsExcelSetup.exe
- MagicDocumentsWordSetup.exe
Bootstrapper
All ClickOnce applications require that the correct version of the .NET Framework is installed on a computer before they can be run; Mago.
net also requires the installation of other components. At installation time, a check will be performed for each prerequisite to determine if it already exists. The
BootStrapper is the program that detects whether each component requirement is already present.
if not it will be installed prior to installing the ClickOnce application.
ClickOnce cache
All ClickOnce applications are stored on the client computer in a ClickOnce application cache.
A
ClickOnce cache is a family of hidden directories under the
Local Settings directory of the current user's folder. This cache holds all the application's files: assemblies, configuration files, application and user settings, and data files.
In this way ClickOnce takes over the task of managing the physical installation of an application from the user. The cache also helps isolate applications by keeping the assemblies and data files for all applications and their distinct versions separate from one another.
Installation
PCs connected to the network can become Mago.
net Client by running the shortcut "
Microarea Mago.Net client setup" located in the folder "Custom" of Mago.
net server (
\\%Server name%\%Installation name%_Custom)or, directly in a browser, by typing the following url:
http://%Server name%/%Installation name%/index.htm.
Requiriements
By starting
Microarea Mago.Net (Mago.NetSetup.exe), it first detects whether any of the prerequisites are already installed. If any of the prerequisites are missing, the Bootstrapper shows an installation dialog box that lists lacking components and displays their license agreement; once the user accepts the agreement, the download and installation process begins.
With the exception of .Net Framework, which is installed via a URL, the packages of any other prerequisites are available in a folder on the Server side (
Apps\Prerequisites).
Application
When all of the prerequisites have been installed (or detected), the Bootstrapper kicks off the installation process of the application itself.
clicking
Install , the download of the client starts.
Files are downloaded within a folder that uniquely identifies the application (eg.:
micr...app_07596ca994cbd84b_0003.0002_ccbbfcf2a6ab78c3) dynamically created by ClickOnce in its
cache (eg.
A8LBZ3XH.T5N\HQ96NYTK.ZV3), located in:
%userprofile%\AppData\Local\Apps\2.0
Once the installation process ends, Mago.
net starts automatically.
Although multiple installations of the Server side (multi-instance) is not possibile, you can install, on the same computer, more Clients referred to different Servers, on condition that the installations have different names.
To install a desktop client on any PC of the local network, use a browser to open the Client Setup web page (http://<server name>/MagoNet).
A web page with the list of the client components available to install is displayed.
Please note that the Administration Console is itself a client component that you may wish to install on different PCs of the network.
To install the Mago.Net desktop client, click on the "Mago.Net" link.
After clicking the link, you will be asked either to run or save the attached executable, choose "Run".
You may be prompted to install some missing prerequisite (i.e.: Visual C++ Runtime Libraries), choose "Install" to go on.
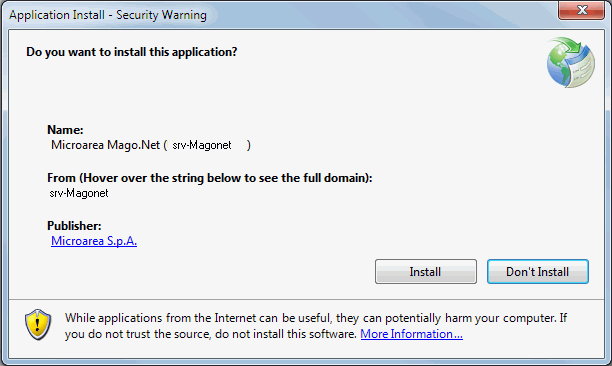
At the end, you will be finally prompted to confirm the installation of the Mago.Net client.
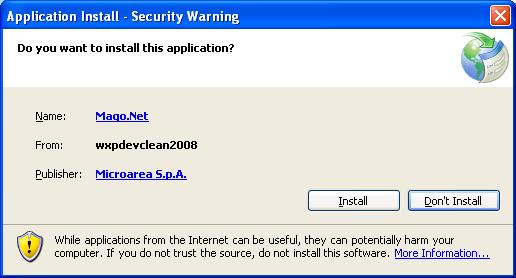
Choose "Install" and wait for the installation to complete. The Mago.Net desktop client is automatically opened.
As the client is deployed as a Microsoft ClickOnce package, each time you will run the desktop client again, a check that a newer version is available on the server will be automatically done; if yes, it will be automatically installed.
Execution
By default the two installation processes create, on the desktop, the helpful shortcuts to run each component.
In details:
- the Server side installation (run by
Windows Installer) creates:
- the shortcut, "Mago.net", to Mago.Net.exe available in the Apps\Publish folder,
- the shortcut, "Administration Console", to MicroareaConsole.exe available in the Apps\Publish folder,
- the shortcut, "Mago.net EasyLook", to the url http://%Server name%/%Installation name%/Easylook);
- the Client side installation (run by
Clickonce) creates:
- the "Microarea Mago.Net (%Server name%)" ClickOnce Application Reference(.appref-ms) file
To start Mago.
net double-click the shorcut available on the desktop.
Uninstall
From
Control Panel » Programs and Features you can remove:
- the Server side identified by: Microarea Mago.net followed by the installed version in the format M.m.sp.build: e.g. Microarea Mago.net 3.5.0.983
- the Client side identified by: Microarea Mago.Net followed by the name of the server to which it refers: e.g. Microarea Mago.Net (srv-Magonet).
Uninstalling the Server side is perfomed via the Windows Installer that, by default, is able to remove (delete) only the objects (files and folders) created during the installation process, all that has been created later, by the user or by the program, must be manually removed. In this way the contents of the folder
Custom is preserved by involuntary uninstalls.
Uninstalling the Client side is perfomed by ClickOnce (dfsvc.exe) and consists in the complete deletion of the folder you created earlier
(e.g.
micr...app_07596ca994cbd84b_0003.0002_ccbbfcf2a6ab78c3).
Update
Thanks to the Mago.
net architecture to update the product to the latest version you can simply update the server side using Windows Installer.
The update process does not run any actions against the "databases"; the upgrade of databases must be run through the Administration Console.
Server side
We remind you that the
msi packages are cumulative as they prevent the need for applying all intermediate versions, and can be used to perform a new installation already aligned to a specific version.
Windows Installer automatically recognizes the old version then:
- if it is
older than that contained in the
msi package, starts the
Update
- if it is
equal starts the Change/Repair mode.
Change/Repair
The Change/Repair mode (also runnable from
Control Panel » Programs and Features ) is embedded in the Windows Installer technology, it allows to repeat the operations previously performed (
Repair) or modify the choices made previously (
Change) by adding additional functionality among those available, for example another
Language Package.
Client side
Thanks to ClickOnce technology updating is automatic. For each execution of the application, ClickOnce performs a check and, if necessary, starts the update (downloading it from the Server) and finally runs Mago.
net which will be, therefore, always aligned to the version present on the Server.
Discontinued products
The Mago.
net structure and prerequisites are different than previous products, so to update them follow the table below:
| TO | Mago.net 3.5 |
| FROM | installation | database |
| MagoXp | new | migrationKit |
| Mago.net 1.x | new | NO 1 |
| Mago.net 2.x | new | automatic |
| Mago.net 3.2.x | overwrite | automatic |
1 Mago.Net 3.2.6. is the last version that provides the MigrationKit from Mago.Net module.
For instance if you move from Mago.Net 2.x to Mago.
net 3.5.x you need a NEW installation (the 2.x installation will not be overwritten) and the company database will be upgraded with no need of any specific tool.
VECCHIO TESTO
In case you installed and used the previous 3.0 Alfa or Beta versions, upgrade them to the final version is not supported.
You have to uninstall the old version and reinstall the new one.
Upgrading the system and company databases is not supported, also. It is suggested to drop the old ones and create new databases.
To upgrade a previous 2.x installation is necessary firstly install Mago.Net 3.0 as described in the previous chapter: the two products, in fact, have a different installation structure, and the 2.x folders will be not overwritten.
Then, you can select the system database used with the 2.x version: it will be automatically upgraded to the new version.
It is now possible to go on with the company databases upgrade, as usual.
If you have done some customizations in the 2.x version (i.e.: report, Favorites menu, etc.) you must copy them from the 2.x server folder to the 3.0 one:
- the source folder will be
C:\MicroareaServer\<instance name>\Running\Custom - the target folder will be
C:\Program Files\Microarea\MagoNet\Custom
After the copy, check that the "Custom" folder has the right permission set ("Everyone" - "full control" are required).
TroubleShooting
Here there is a list of the most common issues you may encounter:
Troubleshooting Setup